Showing posts with label Make Suff. Show all posts

Friday, October 12, 2012

October

Homemade pumpkin pie. Matt can't do gluten so he makes this pie crust. We love it.


Still loving my calendar from Sloe Gin Fizz. Can't wait for the 2013 edition


Can't let go of the flips yet. Why should I?


Homemade Sriracha. We got this idea over at the Lusa Organics blog. So good.


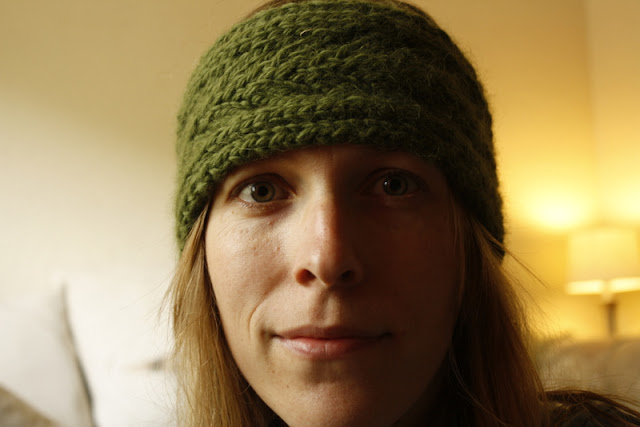
Knitting again!Fingerless mitts for me. They go with the matching headband which I love even more. Find the patterns here.

I didn't know how hard it is to take a proper photo of yourself modeling a headband. I tried, but gave up after awhile. Here are some of the shots anyway.


You can find me on Ravelry now. I am trying to be less of a lurker there and post my finished projects. It is such an inspiring community there, so why not join the fun?

Have a good October weekend!


Tuesday, July 17, 2012

Making Stuff. It's fun.

We are pretty big fans of pie in this house. Okay, huge fans. So, when Matt spied some sour cherries growing along his bike route to school, we knew what had to be done. We harvested ourselves a bucket full of goodness and a pie was made that afternoon. Note: I was too busy eating the pie to take a photo of it. Sorry. I told you I was a pie hound.


I have been making goat milk iced lattes on hot afternoons. We are lucky enough to have this espresso machine at home and it fills our lives with endless joy.


I got into my fermenting groove again and made a big batch of kraut. I am pretty much eating it on everything I can, but my favorite would be on top of our homemade pizza. Don't knock it til' you try it.


But, the coolest thing we have made in some time is this bag right here. 


Yes, we made a market tote out of our spent chicken feed bag. I saw something similar on a women at the farmer's market a few weeks ago and knew we could make one ourselves. And make one we did. 

And here is a tutorial, so you can make one too!

Okay, Step 1:
Get yerself a feed bag, some thread and some webbing for straps. It has to be a feed bag that is almost tarp like in material and looks woven up close. The thread should be of the heavy duty variety to save time and look a bit cleaner in the end. We didn't have that on hand so we just went over stuff a few times when sewing. 
Step 2:
Remove the threading at the bottom of the bag. Hose the bag out and let dry before sewing because it will have some residual grain dust on it. You can always do this after the bag is complete if you're lazy like us.

Step 3:
Turn bag inside out. Sew a line across the bottom where you just undid the thread. Cut off excess material. Then fold these edges under and sew again.


Step 4:
Decide how wide you want your bag to be. We chose 8 inches. Mark this on each end like shown in the photo. Sew that line. Cut off excess material and fold edges under and sew again like you did in the previous step. Repeat on other side and the bottom of your bag will look like the last photo.


Step 5:
Decide how tall you want your bag to be. Measure a line across and then cut on the line. Fold the top under and sew across.


Step 6:
Decide how long you want your straps to be and where you want them located on the bag. Matt used clamps to secure the webbing and then measured it over my shoulder. We wanted straps that were long enough to go across our bodies which makes it more comfortable to use when riding a bike. Cut webbing and singe ends with a lighter to prevent fraying.


Step 7:
Sew strap on bag like shown. We wanted to make sure it withstood some abuse so we did some extra stitching. Repeat 3 more times on each strap end to finish.


Step 8:
Turn bag right side out and you're done! 


Tuesday, March 6, 2012

Send Some Love Today

Hey friends! Perhaps you might remember that one of my goals for 2012 was to write more letters consistently? Well, I have been kicking ass and taking names as far as that goes. I am LOVING it.

I even joined the Letter Writer's Alliance which is a sweet club for other letter geeks like me (and they sell actual carrier pigeons you can send through the USPS!). And I signed up to participate in the Elevated Envelope project. It challenges you to create some art with the common envelope and send it out to strangers across the world.

Yeah, I pretty much have the letter fever and the only cure is more letters.

But anyway...I am still working on my envelope project idea, but I did want to share some fun envelopes I made a few weeks ago with old papers I had lying around the house. Envelopes are easy and fun and you can make a big ol' stack of them in an afternoon. Just peel an old envelope apart that you don't care much about and trace onto your new paper and cut out. Fold and glue and you're done.

Here's one I made with old sheet music I found at a thrift store.


My glue stick had run out and I didn't feel like leaving the house. My sewing machine was right in front of me and inspiration struck. I think I like sewn envelopes even better than glued! No drying time to boot.


This one was made from a picture book of Switzerland I found at a thrift store.


I also made one out of an old map of California, but I sent it off to my brother before I could snap a photo. He loved it!

The ideas are endless for envelopes. Old maps, magazines, paper grocery bags, old wrapping paper all rock. Thrift stores are great hunting grounds for inexpensive materials. As is the back of your closet.

And, in true crafty style, I took the scraps from my envelope making session and made more paper with it!


Sunday, January 8, 2012

Gettin' Crafty with Chickens

Hey Friends! Happy 2012. Hope the holidays treated you all kindly. I took some much needed time away from the computer and I feel refreshed.

I am not into the resolution-y type stuff, but I do try to make goals for the coming year. One of my 2012 goals is to write one letter a week. I probably have mentioned it before, but I love writing letters. Love it. I also really love making little cards and postcards from scratch to send out to friends and family too. Besides soap, it's my crafty activity of choice. I have even had the same pen pal for over two decades!

My letter writing has been sporadic lately, so I thought making a commitment to it would be a good thing. And I have been wanting to do a little tutorial on a greeting card print you can make from old feathers. So, let's do this thing.

Okay, first you need chicken feathers. Or any type of bird feathers you like. Now, don't run up to a bird and yank some feathers off the poor thing. Just look for feathers that have naturally fallen off.We happen to have a bunch that molt off our girls so ask a neighbor or friend who has chickens if they mind if you take a couple of their hands. Or if you can't roust up any feathers, try using dried leaves.

Here we are with our chicken, Blanche. Photo by Dan Stein
Next, you need these things:
* Card stock. Recycled cereal boxes work well.
* Ink or acrylic paint.
* A couple pieces of scrap paper


Next, ink your feather up by holding the piece of scrap paper and pressing the feather down on the pad. Or, if you are using acrylic paint, brush it on the feather with a small paint brush.


Get it good and inky.


Take a fresh piece of scrap paper and press the feather down on the card stock. Press thoroughly. 

Disclaimer: Sorry about the blurred photo and the lack of me showing the feather pressing action. I have realized step by step tutorials are hard to capture when you are the one doing it and taking the photos! Especially with ink on your hands.


Slowly peel feather off and it will look something like this.


Try another in a different color if you like (you'll need a fresh feather). It won't look perfect, but it will look awesome! 

Pictured below what it looks like when I used acrylic paint on feathers. Brushing the paint on allows the coverage to be a little more exact. Neat, huh?


Have fun! And let me know if you try it.

Saturday, November 26, 2011

Homemade Gift Ideas for the Holidays


You might have a feeling I like to make homemade gifts for the holidays. And you'd be right. Truth be told, it's pretty easy when you have a boat load of soap lying around the house. But, I love to be creative and give gifts that allow me to make stuff other than soap. Here are some easy and affordable ideas I have bookmarked or made in the past. Happy Making!

Make a sweet terrarium.
Make your own bird seed feeders...3 ways! In an orange peel, pine cone or cookie cutter. Awesome.
Make a bunch of herb sachets. I love making any gift that allows me the chance to bust out my rubber stamps (dork alert).
Make your own vanilla extract. We like to use bourbon instead of vodka in this house. So good.
Make a batch of my granola. Fill a mason jar with it and add a nice little tag.
Two words:.Chocolate bark. I am so making some this year! 
Make your own flavored salts. Perfect for popcorn lovers. Mmmm.
Knit some felted hot pad handle covers for all your cast iron using friends. 
Whip up a batch of my sugar scrub, facial cleansing grains and facial steaming herbs for a sweet gift basket.
Can some jam. We always do.  


Monday, October 24, 2011

How To: Make Your Own All Natural Sugar Scrub

The other day before I was going to jump in the shower, I caught sight of my legs and, let's just say, they looked like they needed a little lovin'. Hey, it's pretty dry in good ol' AZ! So, I retreated into the kitchen and whipped up a little concoction and, holy crap, my skin felt and looked awesome afterwards! I kinda wanted to eat it too.

 As with most of of my other skincare recipes, you might have most of the ingredients you need lying about your kitchen and it will take you just a few minutes to make. Hooray!

This amount made about 1 use for me, but store any leftovers in the fridge. This is highly recommended before shaving your legs (ya know, if you're into that sort of thing). I even used it on my face (just be gentle with the scrubbin').

Feel free to play around with amounts to your liking. You could use salt too. I just like sugar because it doesn't sting if you happen to have a cut or two on your hand, which I always seem to have.


Bad Ass All Natural Sugar Scrub

1/4-1/2 c. natural sugar (mine was the more finely granulated variety)
1 T. honey
1/2 T. sweet almond oil (or any other oil you like)
a few drops essential oil *optional* (I used Peru Balsam which smells like a woodsy vanilla)

Mix ingredients in a small dish or jar that you don't mind bringing into the shower with you. The scrub should be somewhat of a paste consistency. If your honey is a bit crystallized you will want to warm it before mixing. Slather and scrub. Rinse off. The oil can make things a touch slippery in the shower so proceed with caution!

Enjoy! Let me know if you try it!

Monday, August 15, 2011

It's All About the Beverages

What an awesomely full week it's been! Our friend Dan came to visit from Tucson and we had a great time making and eating food, doing outdoorsy stuff and just hanging out.

We miss you Dan (and thanks for leaving your almond flax butter behind).

And somehow, in between having fun with Dan and going to work, Matt and I managed to get all this done:

* 108 bars of soap made, cut and curing as we speak
* Wild mushrooms hunted and devoured in stroganoff, pizza, stir-fry and frittata
* 12 quarts of spicy dill pickles processed
* 2 quarts dill pickles fermenting on the counter
* 1 batch of gluten free peanut butter cookies baked (and mostly eaten)
* 11 half pints of blackberry jam processed
* 1 large blackberry milkshake consumed
* 1 batch of blackberry switchel made

Pretty excited about the above list. Really excited about the pickles.

gratuitous dill pickle photo
So, at this point, you might be wondering...What the hell is switchel?

I hadn't heard of it either until a berry switchel recipe appeared on Craftypod (one of my very favorite craft blogs) and then I found a recipe for a blackberry shrub (similar to switchel) in one of my preserving cook books. I made mine following the directions from Craftypod, but used blackberries, 1/3 c. honey and 1/4 c apple cider vinegar. I poured a bit over ice and topped with seltzer and a wedge of lime.


Delish.
Especially nice during the evening when you're sitting in your back yard watching your chickens.

Since I was so pleased with my switchel success, I made a rhubarb lime syrup for more beverage goodness. And it turned out great too.

Here's how I made it:
I took some rhubarb (a few pounds I think), cut it up and boiled it with a few cups of water on the stove.


I strained out the rhubarb mush and was left with about a 1/4 cup of rhubarb juice. I added just over a cup of lime juice to this and boiled it on the stove with some honey and agave nectar. I didn't measure, just kept adding until it tasted right to me.


 I served this syrup in the same manner as the blackberry switchel. And adding some tequila to this got a thumb's up from Matt.  Enjoy!

What yummy drinks have you been making this summer?