

I have been making goat milk iced lattes on hot afternoons. We are lucky enough to have this espresso machine at home and it fills our lives with endless joy.

I got into my fermenting groove again and made a big batch of kraut. I am pretty much eating it on everything I can, but my favorite would be on top of our homemade pizza. Don't knock it til' you try it.

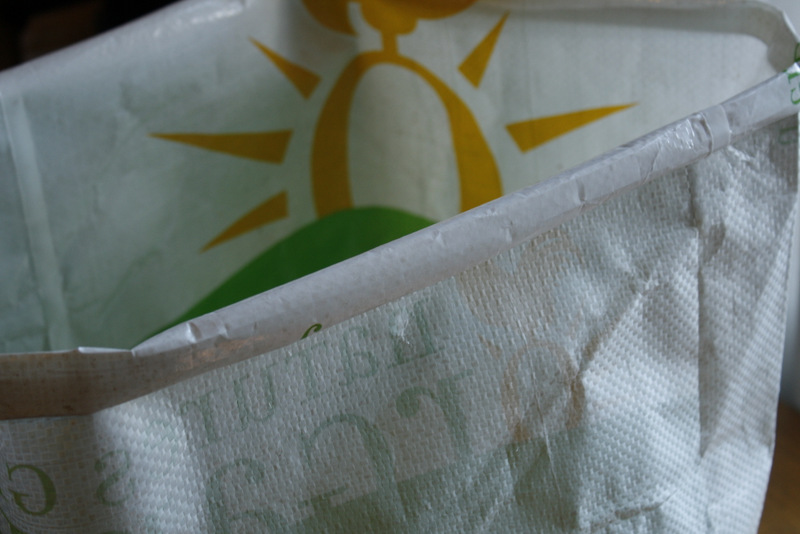
But, the coolest thing we have made in some time is this bag right here.

Yes, we made a market tote out of our spent chicken feed bag. I saw something similar on a women at the farmer's market a few weeks ago and knew we could make one ourselves. And make one we did.
And here is a tutorial, so you can make one too!
Okay, Step 1:
Get yerself a feed bag, some thread and some webbing for straps. It has to be a feed bag that is almost tarp like in material and looks woven up close. The thread should be of the heavy duty variety to save time and look a bit cleaner in the end. We didn't have that on hand so we just went over stuff a few times when sewing.

Remove the threading at the bottom of the bag. Hose the bag out and let dry before sewing because it will have some residual grain dust on it. You can always do this after the bag is complete if you're lazy like us.
Step 3:
Turn bag inside out. Sew a line across the bottom where you just undid the thread. Cut off excess material. Then fold these edges under and sew again.

Step 4:
Decide how wide you want your bag to be. We chose 8 inches. Mark this on each end like shown in the photo. Sew that line. Cut off excess material and fold edges under and sew again like you did in the previous step. Repeat on other side and the bottom of your bag will look like the last photo.


Step 5:
Decide how tall you want your bag to be. Measure a line across and then cut on the line. Fold the top under and sew across.
Step 6:
Decide how long you want your straps to be and where you want them located on the bag. Matt used clamps to secure the webbing and then measured it over my shoulder. We wanted straps that were long enough to go across our bodies which makes it more comfortable to use when riding a bike. Cut webbing and singe ends with a lighter to prevent fraying.

Step 7:
Sew strap on bag like shown. We wanted to make sure it withstood some abuse so we did some extra stitching. Repeat 3 more times on each strap end to finish.


Turn bag right side out and you're done!

YES!!! Oh my god, excellent market bag!!!
ReplyDelete